Potted gold

I’m not one to pick dandelions without good cause; they’re such an amazing plant for so many insects and birds. But I do like a few young leaves in a salad and will dig up roots to make a mineral-rich, caffeine-free coffee. Until now though I’d never tried to make anything edible from the flowers (natural play dough doesn’t count as who wants to eat that?!).

This year the garden is simply teaming with dandelion flowers and there’s plenty to go round for everyone. And when a colleague said she was making dandelion ‘honey’ I was intrigued. “It’s even vegan”, she volunteered, “well, apart from the bugs!”. I’m not a vegan, so I wasn’t worried about a little extra protein and thought I’d give it a try.

One recipe needed 350g of flowerheads. That’s a lot of flowers, especially if you follow the instructions and pull off all the green bits as they can make it too bitter. I started with good intentions and began picking them all off and then realised, even in a national lockdown, that life is simply too short for that.

So, I compromised and took some off and picked half the recipe’s worth, which still took a while. But there’s much worse ways to spend a sunny Spring day than wandering around the garden picking dandelion flowers.

I made mine by adding half a lemon (thinly sliced) and 0.5l of water to the flowers and simmering them gently for about 20 minutes. Leave the mixture in a glass bowl overnight.

In the morning I strained off the liquid through a sieve and put the mush in the compost. Then I added 300g of granulated sugar (it’s supposed to be golden, but getting any sugar at all is a minor achievement at the moment, so I made do with what I had). That’s also a quarter less sugar than most recipes, but it was fine.

Stir the sugar until it dissolves and then simmer for about 45 minutes until it becomes like a thin syrup. Don’t, whatever you do, think that it’s simmering away quite happily and go off to feed the chickens, only to come back to find it’s boiled over and burnt sugar is now ingrained in your hob.

If you haven’t left it to boil over, then you should have enough for two small jars of ‘honey’, which isn’t as good as the real thing, but is surprisingly tasty and a fun way to spend a few hours.

Sprinkling a little magic dust

DSC_1018.JPG
I’ve thought about building a fairy garden for my daughter (and me, if I’m being entirely honest!) for a few years now.

But I’ve been put off by the elaborate, fancy, expensive ones that adorn Pinterest, Instagram and the like.


However, I soon realised it doesn’t have to cost the earth or involve lots of new stuff. The most expensive addition to our fairy garden was three alpine plants, compost and some pea gravel.

It’s amazing how many fairy-garden-ready items you can find kicking around your shed/house/garden, neglected for ages and needing a new purpose in life. Charity/thrift shops are also treasure troves for little bits and pieces.

For the container, I recycled an old Belfast sink which had seen better days and added a log that didn’t quite fit in our fireplace last winter.

DSC_1006.JPG

Tiny sawn pieces of branches made an ideal table and chairs and I used old glass beads for the pond/paths.

DSC_1016.JPG

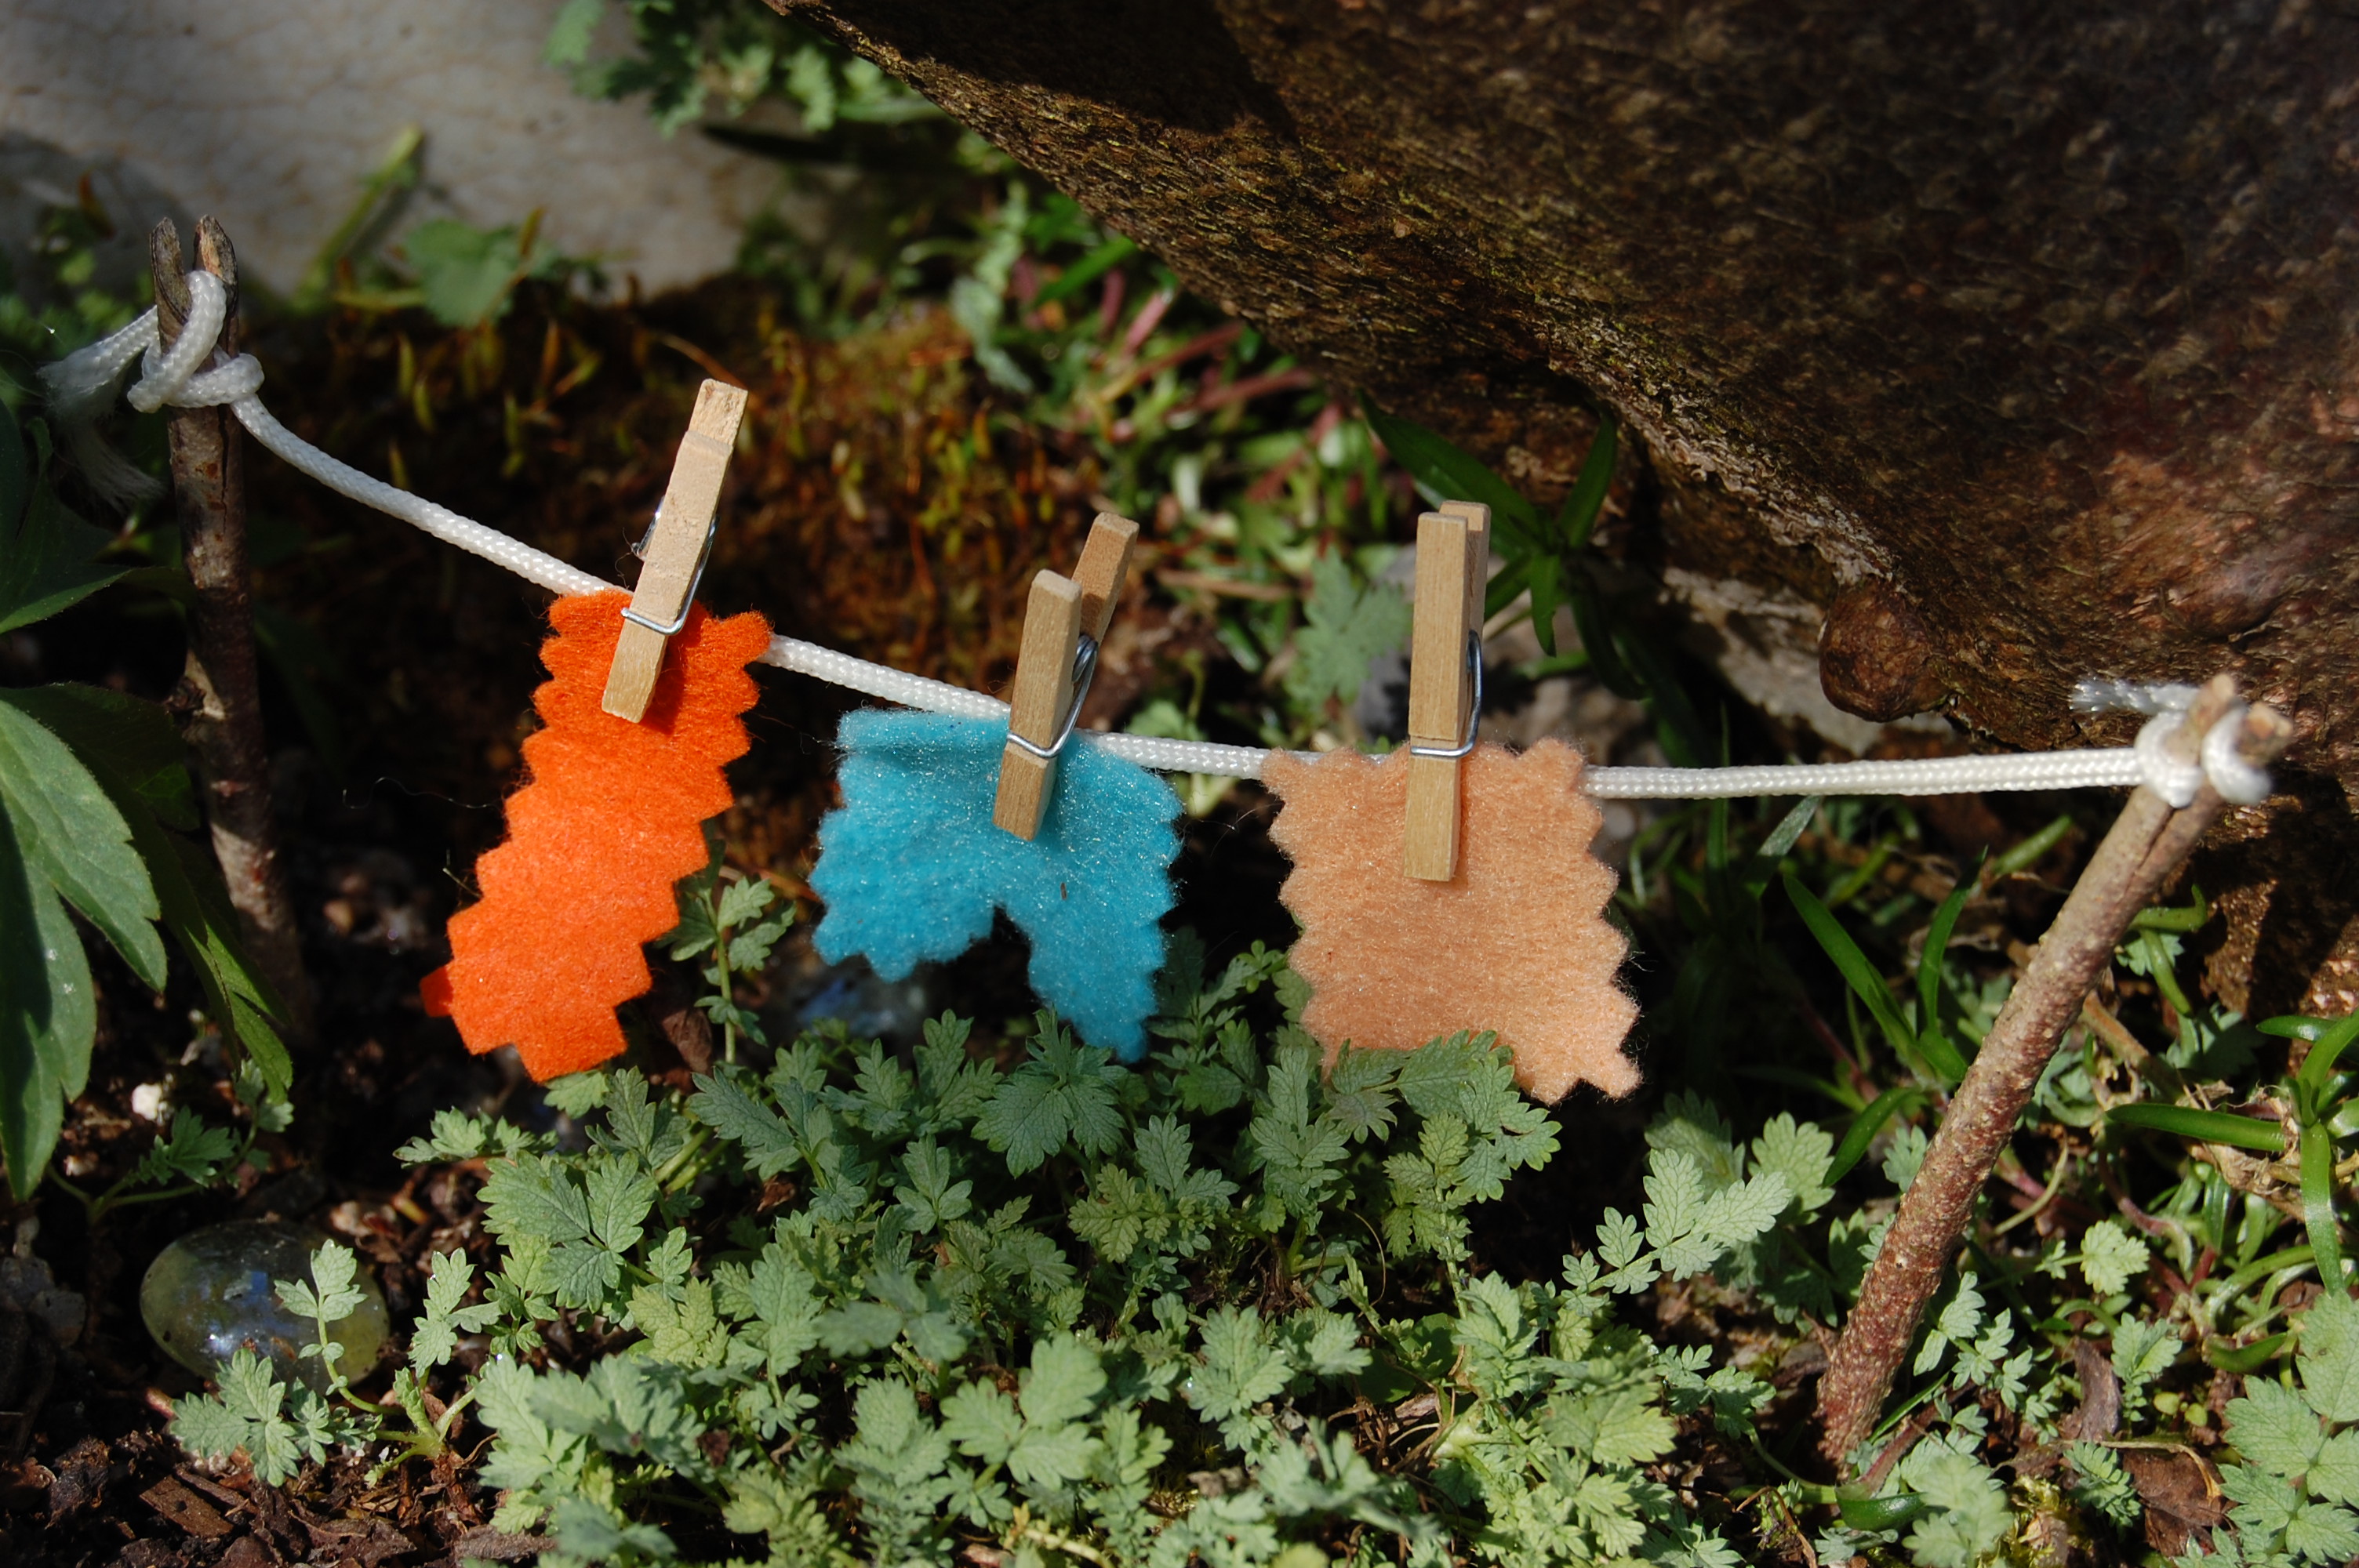
Even fairies have to do washing occasionally so I took two twigs and a piece of twine and cut up some odd scraps of material with pinking shears for the washing. It’s held on with mini pegs, the kind you get in most craft shops.

DSC_1008.JPG

I did concede to a small person’s requests for a few new items, namely this cute ceramic cat, which fits perfectly into his shell bed we dug up. The fairy door was also bought for this project.

DSC_1019.JPG

Knots and holes in the log were chiselled out to insert windows.

DSC_1013.JPG

Not sure the whale is a native to the garden pond, but he moved in all the same.

DSC_1015.JPG

This is the garden’s first Spring as it was built last autumn. Other than having to replace the washing line and take out a few random weeds, it hasn’t needed any maintenance. Unlike a made-to-measure shop bought one, this approach takes a little while longer to ‘bed in’, but I think it’s all the better for it.

You can make the basic garden in a few hours and just add to it as and when you like. Just make sure if you’re using a heavy container like an old sink that it’s in situ before you start! The mix was about a third grit to two-thirds compost as I didn’t want it too rich for the alpines.

It’s also important to make sure you have adequate drainage so the plants don’t rot. As well as a gritty mix of soil, I added small stones along the bottom of the sink and made sure the plug hole was clear.

When choosing plants, alpines are ideal as they don’t take much looking after and are fairly small and compact so work to scale in a garden this size.

The whole garden, including compost, grit, plants and the fairy door and cat, came to just over £10. All the other items were recycled.

It really is very simple and cheap to make and will reward you with hours of play: the only limit is your imagination! Hope you’ve been inspired to sprinkle a little magic fairy dust in your garden soon.

An egg-cellent idea

Don’t get me wrong, I really like chocolate. But I’m not a fan of the mass produced Easter eggs all too present in the shops at this time of year that contain very little ‘actual’ chocolate. I’m also tight, so I tend to wait until afterwards and then get the really good quality Fairtrade ones half price 😉

Anyway, I digress. I’ve always wanted to try natural egg dyeing, but never got round to it. This year, however, I had an incentive: the school Easter egg decorating competition. Once I found out glitter had been banned (really?!), it paved the way for giving it a go.

My five-year-old needed a bit more persuasion though, especially when I started diving head first into the compost bin to retrieve a head of red cabbage that had been in there a few weeks.

I wouldn’t advise using mouldy vegetables for this project, but needs must sometimes and after all, no one was going to eat it, so no harm done. (The smell of cabbage cooking is often bad at the best of times;  it wasn’t really all that noticeable, honest).

Along with the red cabbage (blue), a sweep of the kitchen uncovered some turmeric (yellow), spinach (turquoise apparently) and, there is a theme here, some cranberries at the bottom of the fridge left over from Christmas (allegedly pink). The blue and yellow worked great (see below), the other two not so much.
DSC_0265

You need to place your dye material in just enough water to cover it to make the colour as strong as possible. Boil gently for about 30 mins to an hour, until you get a rich colour, then add one tablespoon of white vinegar for every (US) cup of dye.

The eggs need to be hard boiled for 10 minutes and then cooled. For. Ages. I made the mistake of trying to do it too soon and have no fingerprints left.

Children will love collecting all sorts of foliage and flowers from the garden to press onto the eggs. It’s a bit fiddly when you place them on though. You need a square from an old pair of tights/stockings, place your flowers etc. on the egg and then tie it around before placing in the dye. NB: Alternative swear words will be necessary at this point. There was a lot of ‘fiddlesticks’ involved before it was all over.

Place the eggs in jars of dye and soak for about 4hrs if you can. Don’t be too impatient to remove the tights after taking them out – the eggs need to dry out almost completely or the dye will ‘bleed’ into the white parts.

DSC_0267

The theme was a scene from a story and more by fluke than design, I think the final pattern on the blue egg looks a little like a mermaid with some fish around her and the yellow one a bit like a sun. So we sort-of-cheated and made the story fit the eggs, rather than the other way around. (Little Mermaid when she comes up from the ocean to see the sun for the first time, if you were wondering.)

When I saw the eggs on display with all the other (pretty amazing) entries my heart sank: they were crushed beyond recognition. My daughter rather sheepishly admitted she may have ‘accidentally shut the lid a bit too hard’ on them while showing her friends.

I’m all for giving credit where credit’s due and I wish I’d come across this site before I started on my egg dyeing adventure. There’s lots out there but this one makes it pretty simple and has nice clear photos where children can easily make the link between the dye material and the resulting colour: Mommypotamus Blog

Baby, it’s cold outside

xmastreestick
I appreciate it’s hard to muster up the enthusiasm to get outside for very long this time of year, but personally I find it’s not just my three-year-old who feels better for it if we do!

This week we finally managed to get out of the door to go for a walk in the woods (after a trying half an hour in which I tried, largely unsuccessfully, to convince my daughter that it really was too cold to just wear a short, sleeveless Frozen tutu dress outside).

I’m sure I’m not alone in my clothes battle with a pre-schooler, but for heaven’s sake, why don’t they just take our word for it that it really is cold out there? I have tried just letting her go out in inappropriate clothing to prove a point, but had to give up on that plan of attack when I realised that she’d get hypothermia long before she admitted she was wrong.

We even took a picnic with us, which might seem a bit mad in December, but we like our winter picnics and as long as you’ve got something to put down on the inevitably damp bench and a drink of something warming like a hot blackcurrant, then you’re sorted.

If you only fancy a short trip outside this month for an activity then I’ve got two suggestions for you. One is very messy though, so do remember I have warned you in advance….

Children love making suet bird feeders because it gets everywhere, so be prepared! You will need about an equal mix of vegetable suet and bird seed, although this is not an exact science. The suet can be melted on a camping gas stove outside in an old saucepan (or indoors on the hob) that ideally you can just scrape out rather than having to wash, as that’s the least fun bit of this activity.

OLYMPUS DIGITAL CAMERA

Spread your bird feed out on trays, mix in the melted suet and, once it has cooled a little, children can either roll a pine cone with string attached in the suet and then in the seed (less messy and good for those who are queasy about getting it on their hands) or put it in a yoghurt pot.

The yoghurt pots need a small stick across inside at the bottom to act as a ‘perch’, tied on with a piece of string in the middle. The suet is then packed in on top of this. Leave it to set overnight in a cool place and then the suet ‘cake’ can be knocked out gently and hung up outside for the birds to enjoy.

And for a very quick last minute Christmas tree decoration, why not make a ribbon tree? Simply find a small stick about 15cm long (or cut to size) around 1cm thick and attach strips of old ribbon or material up the ‘trunk’ by simply knotting them onto it, one above the other.

Once you’re happy with the amount you have on (I think mine took about 13 pieces, but it will depend on the thickness of your material) then cut diagonally from the bottom up each side to make a tree-like shape. You can then screw an ‘eye’ (I used an old picture hook) into the top and hang it with some thread or thin ribbon. I made mine (pictured) in a bit of a rush, so I’m sure you can do much better!

Have a wonderful festive season and if you’re feasting on some of your homegrown produce this year – then enjoy! If not, there’s plenty of time to plan what you’ll be growing for next year’s Christmas lunch….

Let there be light

autumnleafjarlit
I have a love/hate relationship with autumn; loving it for its gorgeous hues and crisp, cold mornings but resenting the onset of darker nights, bringing with them far fewer hours to potter in the garden.

One of the best things about autumn though has got to be the leaves. You may already know this, but it was a revelation to me recently that the leaves actually contain most of those colours all year round, but they’re masked by the chlorophyll. As the light levels fall, the leaves stop producing chlorophyll and so the green disappears and the other colours take centre stage. A perfect antidote to shorter days if ever I saw one.

So, in the absence of things to pick or grow (although there are a few autumn raspberries and apples still around if you know where to look), this month’s blog is all about bringing a little more light into the world.

All you need is an old glass jar, some glue, a paintbrush and some autumn leaves, the more colourful the better. We cheated a little and used grape leaves from the greenhouse to make this lantern as most of the ones in our garden have become a sodden mush over the past week.

If you can’t find any leaves, torn coloured tissue paper will work just as well, but you won’t get the extra dose of fresh air from collecting them (unless you walk a long way to the shop to buy it).

How to make your lantern:

  • Thin out some PVA glue with a little water to create the kind of consistency that will leave a thin layer all over the jar (we accidentally added glitter too, but it looked lovely so it stayed!)
  • Once you’ve covered the whole jar, gently arrange the leaves onto it and then brush the glue mixture over the top of the leaves as well.
  • Don’t despair if they keep coming off – they will stick eventually! The trick is to use fairly small leaves if possible as larger ones will curl up as you try to put them on the jar.
  • If you’re using tissue paper, the same technique applies but just tear it up into little pieces beforehand so you create a collage effect. Little hands are definitely an advantage if you can get them to do it slowly and carefully enough!
  • While it dries, you can tie string around to help hold the leaves in place.
  • Then pop a tea light in (you may need a taper to light it depending on how big your jar is) and sit back and enjoy all those lovely autumn colours shining through.

I have also managed to take advantage of the sun shining last weekend and managed to get a few jobs done in the garden.

My three-year-old, who was following me around looking for something to do, looked crestfallen when I told her there weren’t many things we could sow outside at this time of year. As usual, she didn’t believe a word I said and had to find out for herself (a trait definitely inherited from her dad) and marched into the shed to find the seed box.

Now unless she’s been hiding it from me, she can’t actually read many words yet, so I was pretty amazed when she came out clutching a packet of grazing rye (a green manure and one of the few things you can sow outside this time of year) and asked ‘what about this?’ So, there you have it: gardening know-how can be acquired purely by osmosis.

It’s true though that there isn’t much you can sow now, but there’s always the living salads I mentioned in an earlier blog which will do fine on a windowsill indoors year round. You can also sow garlic bulbs this month, but if your ground is prone to water logging, then it’s best to put them into trays of compost undercover somewhere cool like an unheated greenhouse or cold frame and transplant them in Spring, otherwise they might rot.


Food for free

DSC_8198
I love a good forage. What’s not to love? It’s free, fresh food with a bit of adventure thrown in for good measure. As soon as my daughter could walk, I had her out foraging, basket in hand. Now she’s that bit older, she thinks the garden and nearby fields and hedgerows are her own personal supermarket and I wouldn’t want it any other way.

It makes me sad when I hear children saying ‘I couldn’t possibly eat that because it might be poisonous’. That’s not their natural instincts talking: that’s the words of an over-anxious grown-up. It’s true there are things out there that can make you pretty ill, but they are few and far between and with a little bit of common sense, are easily avoided. I have an old, well-thumbed copy of Richard Mabey’s excellent Little Collins Gem Food for Free which you can still get in bookshops for under a fiver. It fits into your pocket and is a handy means of identifying anything you might be unsure of while you’re out and about.

I have a rule that if it’s the first time we’ve come across something, then my daughter double-checks with me to see if she can eat it. She already knows that most small red berries are not good to eat (at least raw, anyway) but easily identifiable raspberries and strawberries are fine. On our walks I can often hear her chatting away to herself like a little mantra: ‘No mouldy bits, no bugs…’ giving foraged finds a once over before popping it into her mouth.

There’s still plenty of free food out there at the moment if you know where to look. I probably should at this point mention that you shouldn’t take fruit from private land as it is illegal, but public rights of way, footpaths etc are fair game. I’m not sure anyone ever told my Grandad this though, as I lost count of the number of trees we climbed and fences we jumped to get to the best foraging grounds, which probably weren’t entirely legal if you interpreted the law to the letter.
DSC_8223
Here in North East England at the moment apples are in abundance almost everywhere and while some can be eaten straight off the tree, others (like crab apples) are better cooked in jams or pies. Autumn raspberries and nuts such as hazelnuts can be found in hedgerows and there are edible greens such as chickweed and nettles literally under your feet.

Blackberries are still hanging in there too, and I like nothing better than to take a couple of baskets out with us to pick some apples and blackberries for a crumble. It’s the easiest thing in the world to make and little hands love to help make the crumble topping and pop blackberries in-between the holes of each apple ring.

  • Make your crumble with half the amount of fat (butter always for me) to flour (use plain flour), sugar to taste, a handful of oats and rub together until it resembles breadcrumbs.
  • Core and peel the apples and make into rings and lay on the bottom of an ovenproof dish, popping blackberries in-between and all over the layers as you build it up.
  • Sprinkle with a bit of sugar and lemon juice to stop them discolouring.
  • Put it in a medium oven at about 160-180 degrees, for about 45 mins.

I never exactly measure out a crumble as it depends on how much fruit I’ve got and how many mouths I need to feed, so don’t worry too much about being accurate. It’s also fun to experiment with different flavours in the crumble – a little ground cinnamon is good with apples, for example.

If you are picking mushrooms then do make sure you know exactly what you’re looking at and even ones that aren’t poisonous can disagree with some people, so it’s not something I’d personally risk with small children. It’s much better to go on an organised fungal walk with an expert.

Foraging is great fun as long as you take a few simple precautions such as avoiding taking anything from busy polluted roads (and who wants to forage there anyway with small people?) and don’t pick anything you’re not sure about. Also, don’t strip anything bare – leave enough for the birds and fellow foragers.

And I’ll just mention that, although my daughter will tell you firmly that sloes do not taste good raw and they’re not on the Top 10 list for foraging with children, they make an excellent flavoured gin for grown-ups and are available in a hedgerow near you now. Just look out for the prickly branches though – the scratches can be really nasty so I’d advise using gloves. I’d also recommend not popping into your local store on the way home to buy a bottle of gin on a Sunday afternoon with a small child in tow either. I think I’m still the talk of the village weeks on….

Slow Gardening

OLYMPUS DIGITAL CAMERA

Time is something most of us don’t have enough of.  I could do with several more hours each day to fit everything in, but when I actually stop and think about it, I’d probably just whizz around like a blue bottomed fly in those as well so maybe it’s a good job I don’t.

It was a timely reminder of the importance of slowing down once in a while when I found myself contemplating a snail crossing my path for a good ten minutes. My daughter had spotted this particular snail some way off, slowly ambling along.

However, there was no question of us walking around it. “We have to wait for the snail to pass,” I was told, quite firmly. You know those times when you can sense a meltdown fast approaching if you disagree? It was one of those. So, we stood there patiently waiting for the snail to make his way across our drive.

To begin with, I was a bit annoyed, thinking of all the things that needed doing, but then it (slowly) dawned on me that it was actually quite relaxing to do nothing other than just watch this snail. To take in all the colours and patterns on his shell; to watch it rock side to side gently as it moved. My daughter was completely focussed and it made me realise that as adults, the times we spend completely engrossed in nature are often few and far between.

I tend to think of myself as in touch with nature as I spend so much time outside in the garden or allotment but if I’m entirely honest, a lot of that time I’m not really taking it all in; I’m thinking about the next job that needs to be done.

Therefore, in honour of my completely made up ‘Slow Gardening Movement (well, we can have it for food and all sorts else, so why not?) this month’s blog is not going to give you something to do or make in the garden with your children. I challenge you instead to do as little as possible.

Just breathe in a little bit of nature together, wherever you are. Kick off your shoes and socks, sit on the grass and feel very blade between your toes; lie on your backs and watch the clouds go by. Go on, try it. You might like it. And besides, all the jobs that need doing will still be there tomorrow…..

Mud, glorious mud

hopmudkitchen
Those of a nervous disposition, look away now: I’m about to admit that my three-year-old is pretty grubby a lot of the time.

Granted, it has a lot to do with having a mum who is a part-time community gardener, but more than that, she, like most children given half a chance, loves getting her hands dirty.

Many parents obsess about sanitising everything and trying to control exposure to germs, but by being super-clean and worrying about children playing outside, we’re actually in danger of making them ill.

Studies have shown that children who grow up on farms have far fewer allergies than those living in an urban environment, and farmer’s children are exposed to plenty of germs!

I’m no scientist but what I do know is that there’s an awful lot of good microbes in a handful of dirt and that early exposure as a child to a healthy microbiome – the community of bacteria living in your body – is key to building a strong immune system in later life.

So if you’ve made it this far, you’re probably with me on the whole dirt thing, so you might want a few ideas of how to get more dirt into your little one’s system!

The good news is, that you won’t have to do much as most children don’t take that much encouraging to get dirty (it’s us adults that make them feel they shouldn’t!) However, you can provide a few props to help with creative play, alongside letting them sow seeds, prick out plants etc.

We’ve just built a gorgeous mud kitchen (pictured) out of old pallets and recycled wood for The Hop Garden which has already provided hours of entertainment to our younger visitors, but you don’t have to be that handy with a hammer to incorporate truly messy play into your garden.
cocktails
“Cocktails anyone?!”

Simply provide access to a spot of dirt you don’t mind being dug up (best avoid any prized flower beds), an old baby bath or washing up bowl, a container of water, spoons, cups etc. and leave them to it.

In no time at all they’ll be whipping up some culinary delight that you simply ‘must try’ made with a generous dollop of mud and some leaves and flowers and getting all those healthy bacteria into their system in the process.

I was reliably informed that the concoction my daughter had created for me to drink was in fact ‘chocolate beer’ – I need to watch out or she’ll be having all my hops to brew next!

Flower child

flowerheadband
It’s that time of year when you really need to be out in the garden enjoying the sunshine, not reading blogs about being outside on a computer (or for that matter, writing them 😉 So, this post is short but sweet, but makes the most of the gorgeous flowers you can find in hedgerows and gardens this time of year.

Making a fresh flower headband is an activity which you can help even very young children to do, and by the age of three, many will be able to do most of this themselves.

Cut a thick strip of paper or card that is long enough to go around your child’s head (we used white but anything you have to hand will do just fine). Either put double sided sticky tape along the entire length or cheat by doubling over regular selotape, which is a bit fiddlier but will still work.

Wander around your outside space looking for flowers and leaves that catch your child’s eye, and arrange them on the sticky side of the headband, filling as much or as little as they like until it’s finished.

Make slits in the bottom of one end and the top of the other so they slot into each other when it meets at the back of the head or simply selotape it together and you’ve got a simple but effective headband that can be made within even the shortest of attention spans!
flowers1
If you have a little more time and are inspired to do some more flower projects, why not try making flower prints? You will need a small rubber mallet for this, but it’s very simple to do.

Just take two pieces of old white cotton and cut it into squares of equal size (it doesn’t matter what size, but probably no bigger than A4 is a good idea). Gather some flowers and leaves and arrange in a picture on one of the pieces then lay the other piece of cotton on top. Give it a good bash with the mallet until you start to see the colours come through and then peel off the bits of flowers and leaves to reveal the masterpiece beneath.
flowersprinting
It’s a bit of trial and error to get the right flowers and leaves – ferns work really well and any white flowers tend to end up as a brown mush, from my experience!

I still haven’t quite worked out what to do with all the fabric pictures yet, although they would probably look quite nice in a frame. I did hear of one woman who made her entire wedding dress using this technique, but I don’t think my skills are up to that standard quite yet!

Treat yourself to an edible tent

teepee1
When I think back to my childhood, one of the most vivid memories is of the camps I made in the woods. The favoured spot was a tiny patch of trees in the local cricket club, where we’d amuse ourselves for hours as my Dad sweated it out on the pitch; we were oblivious to the game, only aware that when it was all over we’d get a soft drink and a packet of crisps as a treat.

They weren’t grand camps by any means, constructed mainly of sticks, leaves and grass cuttings kindly left in helpful piles nearby by the groundsman. But they were such grand palaces in my imagination, complete with several ‘rooms’ and all mod cons.

My daughter loves making tents and camps indoors but now the weather is warming up a little (well at least it was, briefly), I thought we’d take our camping adventures outside for a change.

You may be thinking ‘what’s this got to do with gardening?’ and you’re about to be rewarded for your patience hanging in there. With a few sturdy sticks or poles, some string and about 15 minutes to spare, you can make your own teepee suitable for a toddler in the back garden.

I used hazel cuttings for ours, as we had a tree that needed a prune so it was going spare. You can use most tree cuttings, but best to avoid willow as it will readily root in the ground. If you don’t have handy trees to prune, just use bamboo canes from a garden centre. It won’t look as rustic, and it will cost you a little more, but it will still work out just fine.

Mark out where you want your teepee to sit, making sure to leave enough room for a doorway. There’s no set number of poles you need, but I’d recommend using at least five to get a decent teepee-like shape. Simply push them firmly into the ground and then pull together to tie with string at the top, leaving the wispy bits sticking up if you have them.

This will eventually be an edible teepee, so make several horizontal lines around it (again, leaving room for the doorway) with string to provide support for the climbing plants. There are plenty of options for climbing beans, peas etc. and you can add some nasturtiums (edible flowers and the seeds can also be used as capers) as well for extra colour.

It’s a bit early to risk putting beans out yet, so best start them off in pots on the windowsill or greenhouse now, ready to plant out when the risk of frost is passed (which may be a while for us in the North East, but by end of May for everyone else….) Plant two to a small pot and make sure the lip of any beans you sow is pointing upwards – when you plant them out you’ll need enough to put two either side of each pole.
chamomile
I got a bit ambitious with my teepee floor, and it may not work, but I thought it would be lovely to have a soft cushion of scented chamomile (above) to sit on while you’re hiding in the teepee, so planted a couple of plants in the centre. You could try other creeping herbs such as thyme as well.

I didn’t think a toddler would be able to get much out of the actual making as it’s a bit fiddly for little fingers and you need to be able to reach fairly high, but my daughter loved adding her own kitchen, cooker, bedroom and the like made out of tiny sticks to the construction as we went along, muttering quite happily to herself – that was an added bonus! So why not dig out that inner child this weekend and make a teepee? You know you want to…